 Cannabis firm sues shipper
 Check your travel medical
 New orca rescue attempt
 No bail in Ottawa killings
  Banks must say rebate
  Regulating power prices
 Iran fires at attack drones
  World's largest election
  2 detained in Volkov attack
  Apple pulls apps from China
 Oil and gas leases restricted
 Indigo needs turnaround
  Warriors ready for Round 2
 Kalamalka Bowl cancelled
 Rockets live to fight on
 Hilton teams up with Sia
 Swift still 'can't forgive' Kim
 Grimes to ‘cap the disarray’


Strictly Woodwork
-
alanjh595

- Banned
- Posts: 24532
- Joined: Oct 20th, 2017, 5:18 pm
Re: Strictly Woodwork
Here is my dart board on wheels. It is semi-finished, I just thought I would study it for awhile and see what decorative alterations I want to make before it gets painted.
The board portion can be lifted off so that the stand can be easily wheeled into the storage room when not in use.
Since I was making chalk boards for the wings, I made 13 more that I will sell.
They are actually green in colour not black as seen in the photo. (Too much backlight screwed with the camera)
Since I was making chalk boards for the wings, I made 13 more that I will sell.
Bring back the LIKE button.
-
stuphoto
- Grand Pooh-bah
- Posts: 2754
- Joined: Sep 18th, 2014, 7:41 am
Re: Strictly Woodwork
Looks great.
One thing I like about your design, is it's easy to modify it and make it sliding. So if you have some children or short people over regularly you could lower it for them. Not that you would want someone with bad aim throwing darts in that room.
I am wondering if the paint you used on those chalk boards is that paint with metal in so you can stick a magnet on them too.
13 chalk boards, that's a bad number so you had better sell one quickly
-
alanjh595
- Banned
- Posts: 24532
- Joined: Oct 20th, 2017, 5:18 pm
Re: Strictly Woodwork
Well, it's 15 if I add in the two for the dart board.stuphoto wrote:Looks great.
One thing I like about your design, is it's easy to modify it and make it sliding. So if you have some children or short people over regularly you could lower it for them. Not that you would want someone with bad aim throwing darts in that room.
I am wondering if the paint you used on those chalk boards is that paint with metal in so you can stick a magnet on them too.
13 chalk boards, that's a bad number so you had better sell one quickly
Bring back the LIKE button.
-
seewood
- Guru
- Posts: 6518
- Joined: May 29th, 2013, 2:08 pm
Re: Strictly Woodwork
Does look great Allanjh595.
Going to have to spend more time in my shop.
At the moment I'm getting ready to start the timber trellis.
I have poured concrete for the footings and installed the post brackets I made a while ago.
Going to have to spend more time in my shop.
At the moment I'm getting ready to start the timber trellis.
I have poured concrete for the footings and installed the post brackets I made a while ago.
- Attachments
-
I am not wealthy but I am rich
-
alanjh595
- Banned
- Posts: 24532
- Joined: Oct 20th, 2017, 5:18 pm
Re: Strictly Woodwork
Boy OH Boy.....
Ever since I set up my new dart board, I have been practicing.....and.....
Is my elbow/bicep become sore......![[icon_lol2.gif]](./images/smilies/icon_lol2.gif ":haha:")
Anyone that considers darts a game and not a sport, just doesn't have any idea.......
Today, I am working on my "torsion box" sawhorse (beams/supports/extensions), I don't know what to call them.
I made them out of an old couple of doors (5/8" thick MDF) I have been using them for a couple of projects now and I have found them very handy.
Just picture a hollow 6x6.
Today, I am going to rout out rectangles on both sides X12"L.
This will allow me to put clamps, or other stuff in a place off of the main work surface and allow for the use of smaller clamps.
I am just waiting for the glue to dry on my router jig before I can use it. I hope that I will have photos later today.
Have a great day, you fellow chippies.
Ever since I set up my new dart board, I have been practicing.....and.....
Is my elbow/bicep become sore......
Anyone that considers darts a game and not a sport, just doesn't have any idea.......
Today, I am working on my "torsion box" sawhorse (beams/supports/extensions), I don't know what to call them.
I made them out of an old couple of doors (5/8" thick MDF) I have been using them for a couple of projects now and I have found them very handy.
Just picture a hollow 6x6.
Today, I am going to rout out rectangles on both sides X12"L.
This will allow me to put clamps, or other stuff in a place off of the main work surface and allow for the use of smaller clamps.
I am just waiting for the glue to dry on my router jig before I can use it. I hope that I will have photos later today.
Have a great day, you fellow chippies.
Bring back the LIKE button.
-
alanjh595
- Banned
- Posts: 24532
- Joined: Oct 20th, 2017, 5:18 pm
Re: Strictly Woodwork
Here are the "torsion boxes' after the cut-out have been completed.
Now they are so much easier to handle and I don't have to bear hug them to stand them up.
If I was to do it again, I would have used 3/4" plywood and a smaller router bit (I used what I had on hand, and that was a 1/2" bit).
Now I have a place to put the tools/clamps I am using in the holes and keep the work surface clear.
If I was to do it again, I would have used 3/4" plywood and a smaller router bit (I used what I had on hand, and that was a 1/2" bit).
Now I have a place to put the tools/clamps I am using in the holes and keep the work surface clear.
Bring back the LIKE button.
-
W105
- Guru
- Posts: 7844
- Joined: Apr 20th, 2012, 8:46 am
Re: Strictly Woodwork
saw this and I thought maybe some of you gents might be interested..it's a tool chest of an American Master Carpenter and piano maker dated 1890..
-
stuphoto
- Grand Pooh-bah
- Posts: 2754
- Joined: Sep 18th, 2014, 7:41 am
Re: Strictly Woodwork
That is one amazing tool kit, everything he needs neatly organized with no room to spare.
I wonder how much it weighs. With those planes in there I am thinking it looks heavy.
But then again, Men were Men back then.
Alan,
Have you made your own router table?
If you have I would love to see some photos of it, even if it's rough.
That is one of my next projects.
I have a fair amount of scraps I am trying to use up on small projects.
Oh I am in Kelowna today, and plan on buying a Spoke Shave.
I wish I could afford a Veritas but a nice Stanely will do.
-
alanjh595
- Banned
- Posts: 24532
- Joined: Oct 20th, 2017, 5:18 pm
Re: Strictly Woodwork
I have been thinking about building a router table, but that is as far as I have progressed. I have 10 routers, I am sure I can choose one of them for this purpose. I think it will be the monster Porter Cable with electronic speed control.
Most/all of my projects these days are on the small side, due to lack of space, the cost of lumber, etc.
I would be dangerous with a big space available. I would love nothing more than to get a big table saw with a 3Hp motor, and plumb a shop for dust extraction and a 5Hp compressor again.
I swear, my next home will be a 1000sq/ft house with a 2000+sq/ft shop and no neighbours within hearing distance of a big planer noise.
Bring back the LIKE button.
-
seewood
- Guru
- Posts: 6518
- Joined: May 29th, 2013, 2:08 pm
Re: Strictly Woodwork
I had a KIng 3hp left tilt. Not a bad saw but I could see the blade wobble as it slowed down to a stop. I noticed a neighbours 3hp Delta 3hp cabinet saw did not do this.alanjh595 wrote:I would love nothing more than to get a big table saw with a 3Hp motor, and plumb a shop for dust extraction and a 5Hp compressor again.
Sold the King and have a Saw Stop now. No wobble.
I am not wealthy but I am rich
-
alanjh595
- Banned
- Posts: 24532
- Joined: Oct 20th, 2017, 5:18 pm
Re: Strictly Woodwork
I used to have a Delta 3Hp, 220v, it was great! I just can't see spending the $$ on a Saw Stop.
Good table saws are hard to find these days.
Good table saws are hard to find these days.
Bring back the LIKE button.
-
stuphoto
- Grand Pooh-bah
- Posts: 2754
- Joined: Sep 18th, 2014, 7:41 am
Re: Strictly Woodwork
Sorry, several pictures spread over a few posts due to board limits.
I hope you don't mind me straying a little Alan,
My late, great, Uncle Carl did teach me the basics on how to restore wood projects, however I ultimately choose another avenue.
That is to age things.
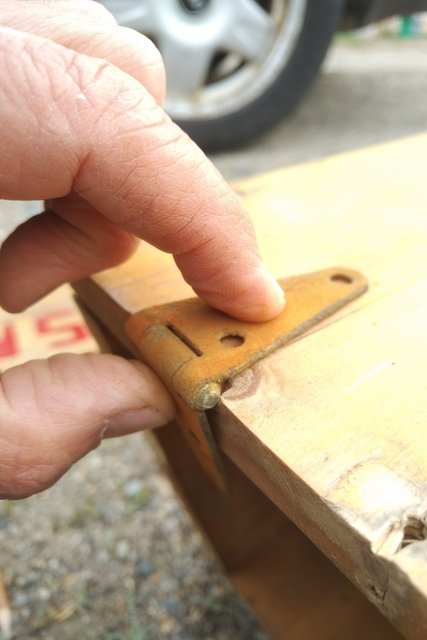
So when a friend of mine with a second hand store had this box and offered it to me for $10 I jumped at it.
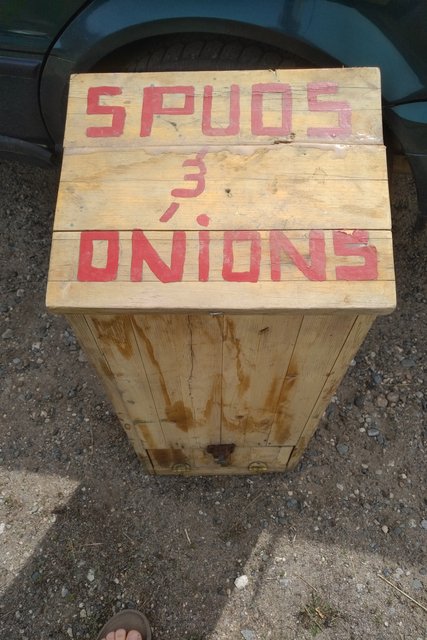
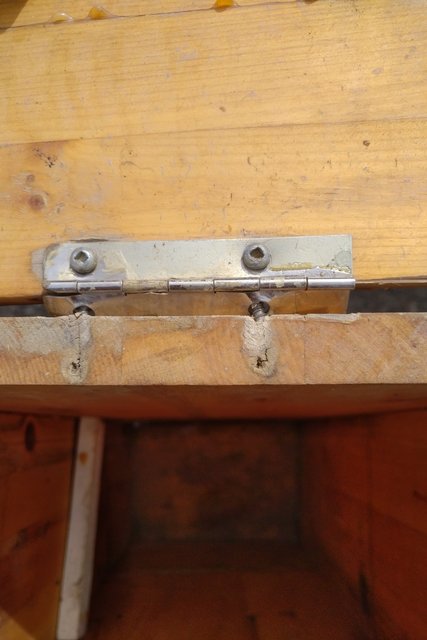
With the idea of leaving it alone except for the hinges which don't match the age.
I thought the clasp was perfect and left it alone.
I hope you don't mind me straying a little Alan,
My late, great, Uncle Carl did teach me the basics on how to restore wood projects, however I ultimately choose another avenue.
That is to age things.
So when a friend of mine with a second hand store had this box and offered it to me for $10 I jumped at it.
With the idea of leaving it alone except for the hinges which don't match the age.
I thought the clasp was perfect and left it alone.
-
stuphoto
- Grand Pooh-bah
- Posts: 2754
- Joined: Sep 18th, 2014, 7:41 am
Re: Strictly Woodwork
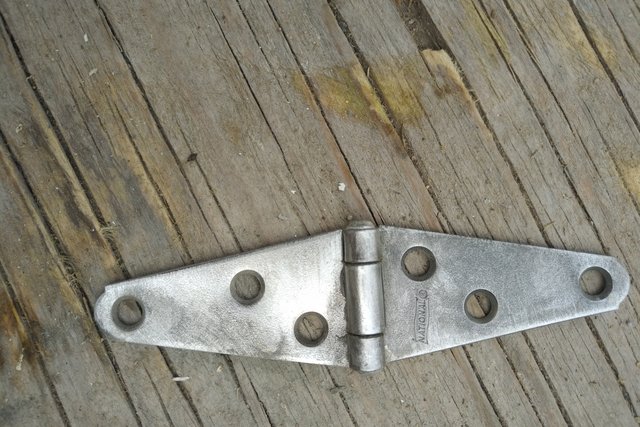
Since the top hinge doesn't belong there I convinced Hardy to throw in 2 like this.

Put it into a bath of baking soda and water with a negative terminal going to a solar panel and a new nail hooked to the positive. With a small space between. This is the nail 2 minutes later.
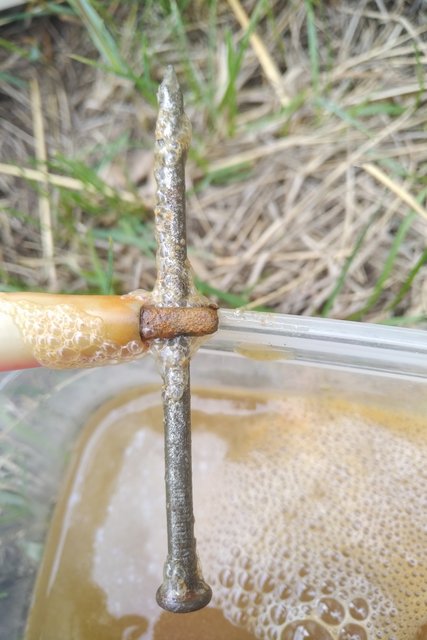
After about 10 minutes
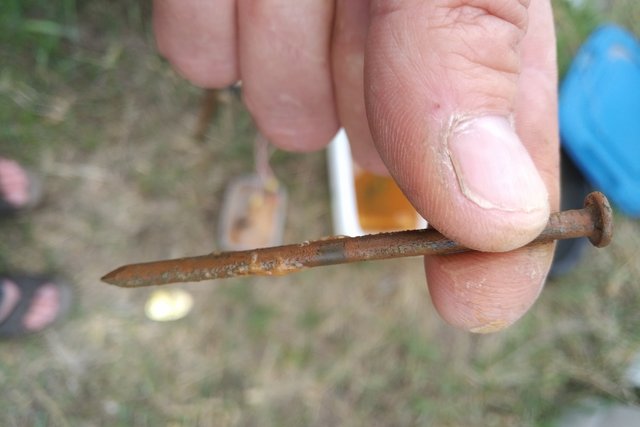
And the hinge with most of the finish gone.
Put it into a bath of baking soda and water with a negative terminal going to a solar panel and a new nail hooked to the positive. With a small space between. This is the nail 2 minutes later.
After about 10 minutes
And the hinge with most of the finish gone.
-
stuphoto
- Grand Pooh-bah
- Posts: 2754
- Joined: Sep 18th, 2014, 7:41 am
Re: Strictly Woodwork
Next comes the aging process.
I took a rusty bolt and placed it onto the negative side and the hinge on the positive side.
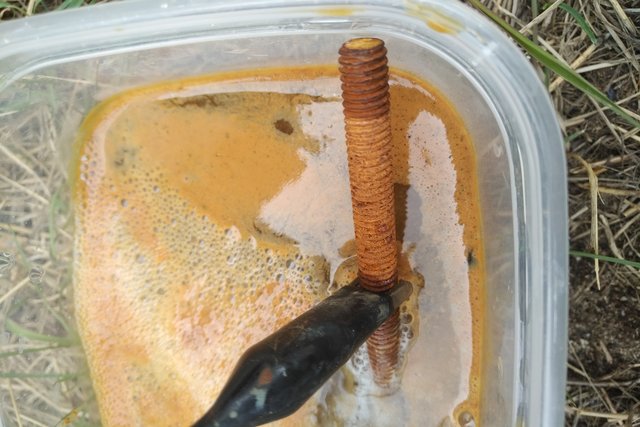
And it got a beautiful layer of rust within minutes.
I took a rusty bolt and placed it onto the negative side and the hinge on the positive side.
And it got a beautiful layer of rust within minutes.
-
stuphoto
- Grand Pooh-bah
- Posts: 2754
- Joined: Sep 18th, 2014, 7:41 am
Re: Strictly Woodwork
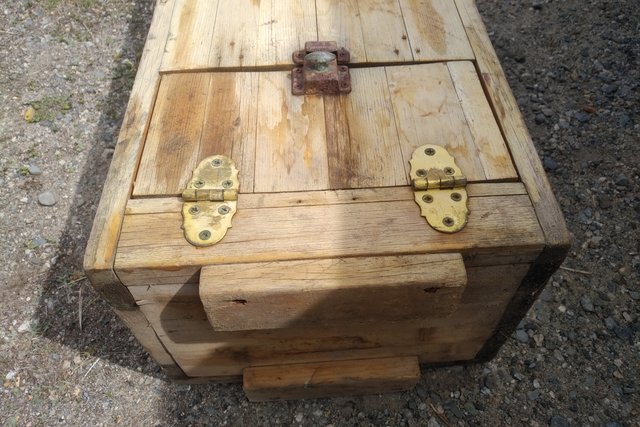
For the most part I did the same thing with the Brass hinges

A lot more junk came off.

And the rust transfer had an unexpected result turning it green.

The water during the process.
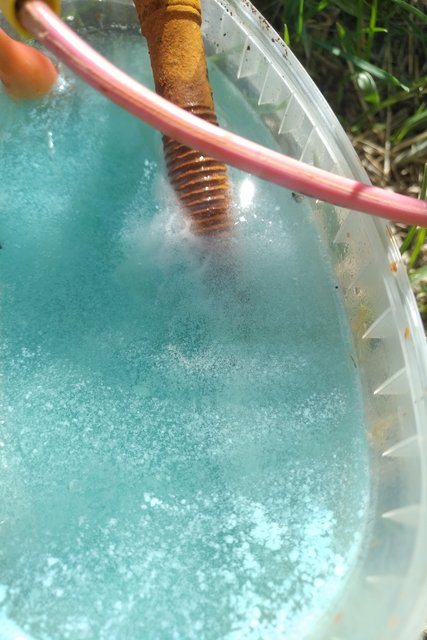
I didn't like the look but a moment with the wire wheel helped.

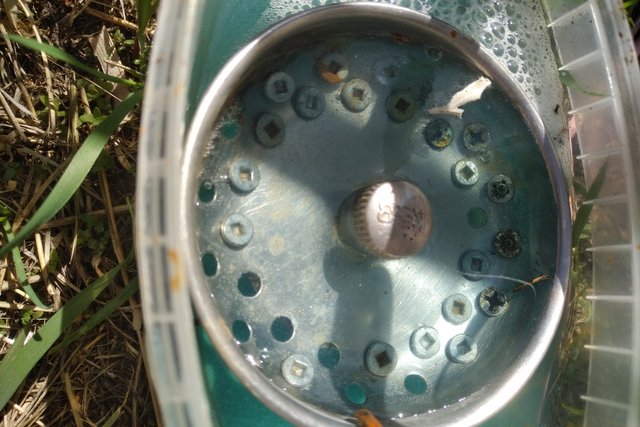
Oh for the screws I used an old kitchen sink plug.
A lot more junk came off.
And the rust transfer had an unexpected result turning it green.
The water during the process.
I didn't like the look but a moment with the wire wheel helped.
Oh for the screws I used an old kitchen sink plug.